Animating a Line Using Trim Paths |
|
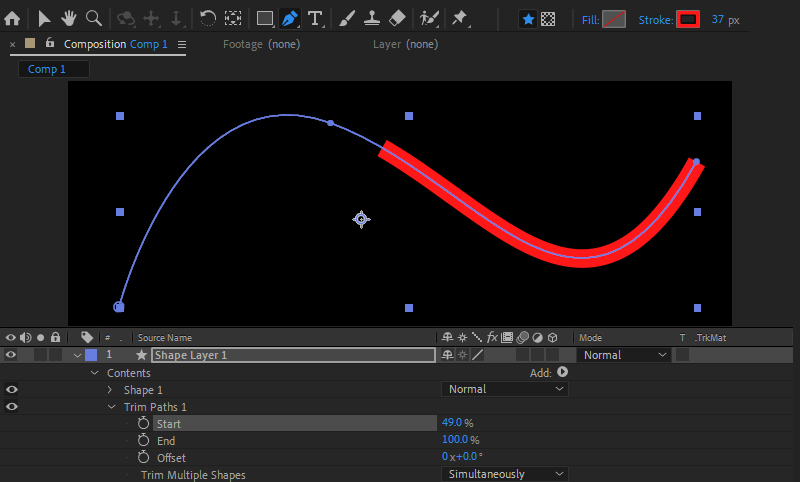
Once a Trim Paths has been added, its parameters are added to the Shape Layer's "Contents" Timeline track. Twirl it down to find Start, End, and Offset parameters which are at the heart of this feature. Scroll the value of the Start and End points to see what effect each has on the line. Modify both (i.e. Start=25% and End=75%) and then scroll the value of Offset to see what it brings to the party. Know that each of these values can be animated over time to understand all of the different ways this line can be keyframed. While the Shape Layer/Line tools in After Effects are solid, those found in Illustrator can take things to a whole new level. Luckily, it is possible to import Paths from Illustrator and define them as Shape Layers (as well as other things, like Masks!) These can be animated using Trim Paths. This would include any sophisticated Pen Tool paths as well as the uber cool Spiral Tool paths. |