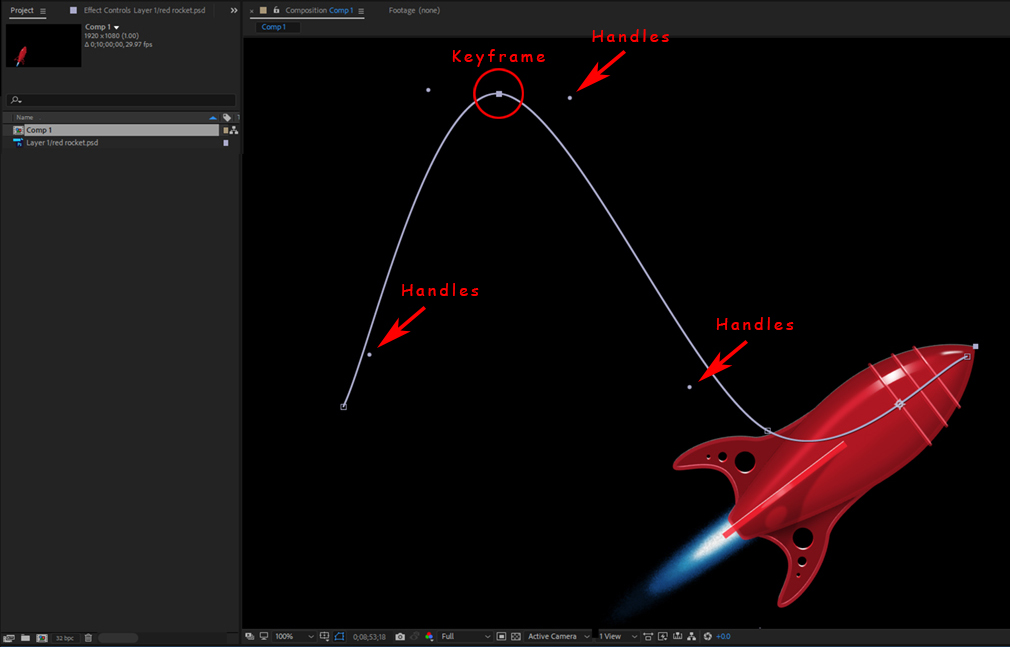
Animating the position of a footage file will generate a Motion Path that allows you to see the overall trajectory of the motion. (The Display tab in AE Preferences will allow you to show ALL of the keyframes on a track, which will give you the most visual feedback on this property.) The tension between position Keyframes is expressed as the Path itself and can be modified by adjusting one or more Handles at that keyframe as well as those of the keyframes to either side. These Handles appear as dots to either side of a Keyframe - but will reveal the handle that connects them as soon as you grab one with your mouse. AE defaults to Auto Bezier interpolation method - an even distribute of tension onto either side of keyframe. There are 5 interpolation methods possible, which can greatly alter the resulting motion: A. Linear B. Auto Bezier C. Continuous Bezier D. Bezier E. Hold. You can move between the default Auto Bezier and Linear by Ctrl-Alt-Clicking the keyframe on the motion path. Alt-Clicking its handle will change it to Bezier and break the incoming and outgoing tensions to create abrupt changes in direction. |