Working the TimelineUNDERSTANDING
THE KEYFRAME
|
|
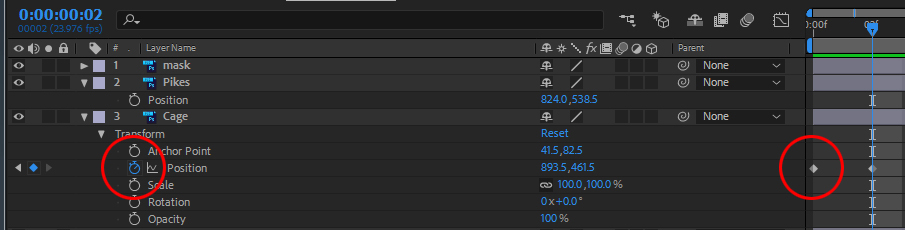
In After Effects, you click on a property's Stopwatch icon at left of the timeline to create a keyframe at a the cursor location. Once clicked, the parameter remains animatable for the duration of the comp. Any changes made to that property will then be recorded in a new keyframe wherever the timeline cursor has been moved to. Careful! Clicking the Stopwatch a second time turns off the Stopwatch and erases all previously recorded animation events for that element. If you need to refine a keyframe's value, move the timeline cursor to the exact frame as a keyframe. The most precise way to do this is to click on the tiny arrows to the left of the Stop Watch to go to the Next Keyframe or go to the Last Keyframe Right-Clicking a Keyframe will bring up a context sensitive menu that offers quick access to relevant tools, such as the Keyframe Assistant menu, where you can introduce "Eases" to the Keyframe's value. |